Follow Me On Social Media!


Jack Skellington Oreo Pops

Jack Skellington Oreo Pops
Jack Skellington Oreo Pops will delight your Halloween gatherings with a whimsical combination of flavors and festive designs. These adorable treats are not only a visual feast but are also simple to make, enchanting both children and adults alike. Whether you’re throwing a party or looking for a fun activity with the kids, bringing these spooky snacks to life ensures a memorable culinary experience. In addition, these delightful pops tie in perfectly with other Halloween-themed treats, such as Halloween Oreo Stuffed Chocolate Chip Cookies, making your dessert table a wonderful representation of the season. 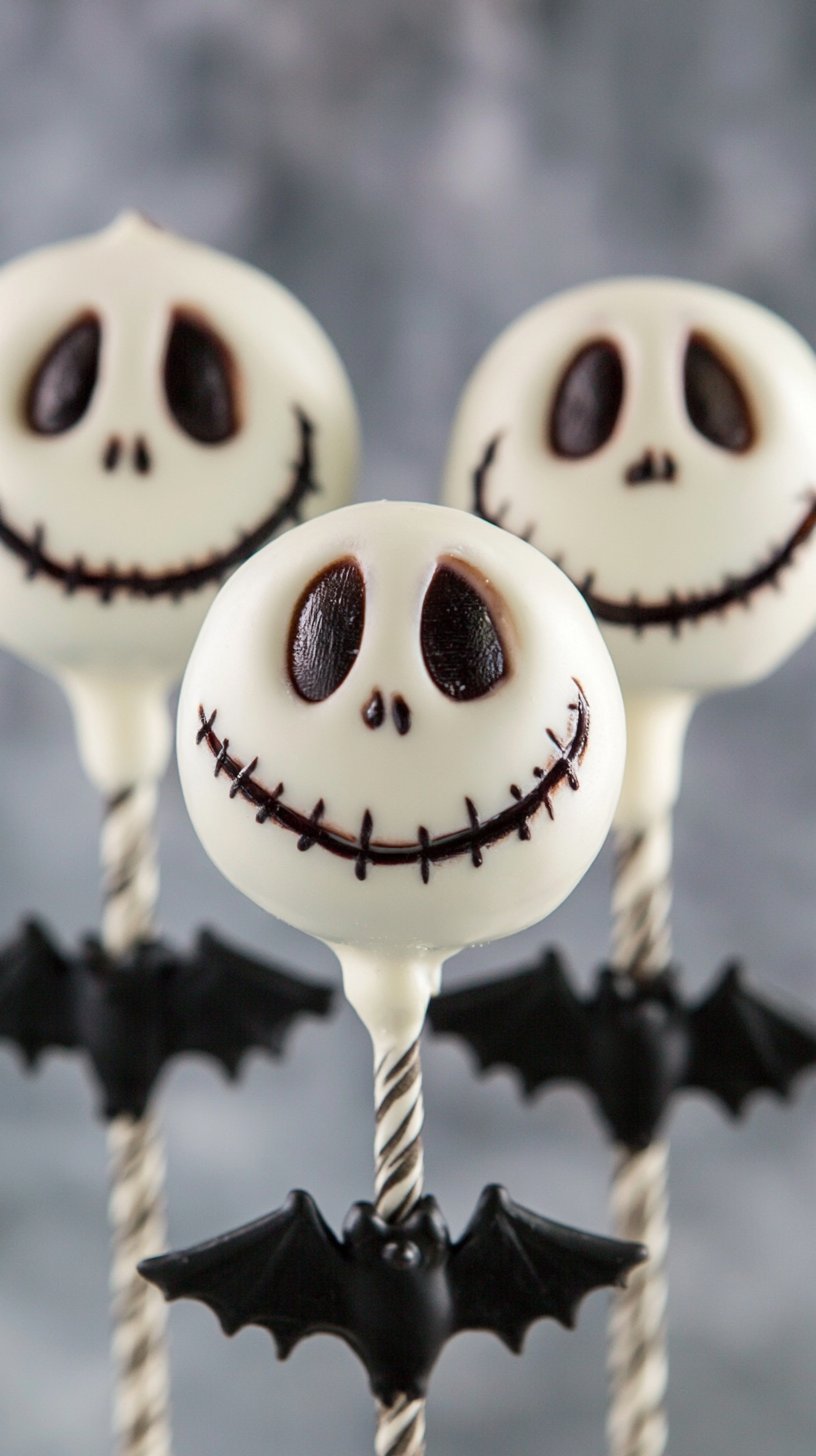
What Makes This Recipe Stand Out
What sets Jack Skellington Oreo Pops apart is their playful presentation and effortless preparation. Each pop embodies the spirit of Halloween, allowing you to get creative while preparing a treat that fits perfectly into a spooky celebration. The balance of chocolate and vanilla flavors paired with the entertaining decoration process captures the essence of joyful festive cooking. The use of chocolate-covered Oreos ensures that they are inherently delightful, while a touch of creativity can transform simple pops into impressive show-stoppers. With the versatility in presentation, you could also explore variants like Oreo and Nutella Stuffed Cookies, creating a tasty spread that elevates any party ambience.
Ingredient Breakdown
Before diving into the cooking process, it’s essential to understand the components that make these pops delightful. You may also find Grilled Salsa Verde Pepper Jack Chicken useful.
• Oreos: Base for pops
• White chocolate: Coating and sweetness
• Coconut oil: Thin coating agent
• Lollipop sticks: For easy handling
• Edible markers: Decoration for details
• Black royal icing: Features, eyes, details
• Chocolate bats (optional): Creative embellishments
The ingredients for Jack Skellington Oreo Pops combine classic flavors and fun elements to create a treat that’s visually appealing as well as delicious. The Oreos serve as a sturdy base, with the white chocolate providing a sweet and creamy outer layer that complements the cookie’s crunchy texture perfectly. Coconut oil acts as a thinning agent, ensuring the chocolate coats evenly. Lollipop sticks are essential for easy eating, while edible markers and black royal icing add character and a festive touch. Optionally, adding chocolate bats gives an extra spooky vibe, perfect for Halloween gatherings.
| Ingredient | Role |
|———————|——————————|
| Oreos | Base for pops |
| White chocolate | Coating and sweetness |
| Coconut oil | Thin coating agent |
| Lollipop sticks | For easy handling |
| Edible markers | Decoration for details |
| Black royal icing | Features, eyes, details |
| Chocolate bats | Creative embellishments |
Step-by-Step Preparation for Jack Skellington Oreo Pops
Always add {image_template} tag before Ingredients.
Step One
Begin by gathering all your ingredients and supplies. Familiarize yourself with the process before starting, as it helps to streamline your kitchen workflow. Place a baking sheet lined with parchment paper nearby to hold your finished pops. Prepare your workspace to ensure it’s clean and ready for decorating, as this activity can sometimes get a bit messy.
Step Two
Next, take the lollipop sticks and gently insert them into the cream-filled side of each Oreo cookie. Ensure the stick is pushed in far enough to provide a solid handle but be careful not to split the cookie. It’s important to use sturdy Oreos here, as they will hold up well against the melting chocolate. Have all the sticks inserted before moving on to the chocolate melting phase.
Step Three
In a microwave-safe bowl, combine the white chocolate melts with a small amount of coconut oil. Heat in short intervals, stirring frequently until the mixture is smooth and fully melted. The addition of coconut oil will help achieve a silky consistency that adheres beautifully to the Oreos. Once melted, allow the chocolate to cool slightly before dipping to prevent it from being too hot, which could melt the Oreo.
Step Four
Carefully dip each Oreo pop into the melted chocolate, ensuring it’s fully coated. Allow any excess chocolate to drip back into the bowl before placing the coated pops on your prepared baking sheet. Ensure they are spaced out to prevent sticking. Once all pops are coated, place them in the refrigerator for about ten minutes or until set. Meanwhile, prepare your decoration tools by getting your edible markers and royal icing ready for the fun part of adding details and character to your pops.
Full Cooking Directions
Gently push lollipop sticks into Oreos. This will create a solid handle for your pops, making them easy to eat. It’s essential to apply just the right amount of pressure during this step to avoid breaking the cookie.
Mix coconut oil into the white chocolate (Candy Melts). This mixture should be creamy and smooth, enabling you to dip the cookies easily. The coconut oil helps in achieving a thinner consistency that allows for even coating.
Dip Oreos into melted chocolate until completely coated. Allow excess chocolate to drip away before placing them on a lined baking sheet. The coating should be even and glossy, giving them that professional look.
Place in the refrigerator to harden. This will take about 10 minutes. The cold will set the chocolate nicely while you prepare for the next stage of decorating.
Push the straw over the lollipop stick. This adds flair and creates a fun visual element that’s engaging for kids.
Draw the mouth and stitches on the Oreo with the marker. Use black edible markers to create the charming features of Jack Skellington, giving each pop a unique personality.
Add the eyes and nostrils with the black royal icing. A steady hand is key here; you want your eyes to be round and even for an authentic look. Go over the mouth with the icing but not the stitches.
Attach the chocolate bats to the paper straw. These little embellishments are optional but can enhance the overall festive look of your pops.
Let the icing harden. This will take an hour or two. Do NOT refrigerate, as this can alter the texture of the icing.
Chilling is important as this will ensure the chocolate is firm enough to withstand handling. With a bit of patience, you’ll have gorgeous, themed desserts that are perfect for your Halloween gatherings.
Pro Tips & Extra Guidance
When preparing Jack Skellington Oreo Pops, consider customizing the design for different occasions, like birthdays or themed parties. For example, you can blend various colors of chocolate to create a rainbow effect or change the design from Jack to various characters from the Halloween universe. Alternatively, store any completed pops in a clean, airtight container to preserve their freshness.
To troubleshoot possible mixing or coating issues, ensure that your chocolate is melted properly and not overheated. If the chocolate solidifies too quickly, you can reheat it slightly until it returns to a workable, velvety texture.
If you’re working with kids, give them some creative freedom by allowing them to create their own designs. You might want to have a few examples prepared, such as Oreo Cheesecake, which can inspire their creativity while keeping the process fun.
Best Practices for Storing & Reheating
To preserve your delicious Jack Skellington Oreo Pops, keep them refrigerated in an airtight container. This will prevent any moisture from spoiling the chocolate layer. Ensure they are cool when you seal them, as condensation can form inside the container, negatively impacting the texture. If you prefer room-temperature storage, place them in a cool, dry area away from sunlight.
While these pops are best enjoyed fresh, they can last up to two weeks when stored properly. Avoid freezing the pops, as this can cause the chocolate coating to crack and ruin the pops’ appearance.
Common Questions Answered
How far in advance can I make these pops?
You can prepare Jack Skellington Oreo Pops up to two weeks before your event. Just ensure they are stored properly.
Can I use milk chocolate instead of white chocolate?
Yes, milk chocolate can be used, but it may alter the final flavor profile slightly.
How do I ensure my pops have a smooth coating?
Make sure to mix enough coconut oil into the melted chocolate and dip quickly to avoid any thick patches.
What kind of icing should I use for decoration?
Black royal icing is ideal for decorating. You can also use fondant for more advanced decorations.
Are there any allergy considerations?
Ensure to check for any allergy information on the ingredients, particularly the cookies and chocolate.
Can I make these gluten-free?
Yes, you can use gluten-free Oreos to create a gluten-free version of these pops.
How can I transport these pops?
Use a secure container and layer parchment paper between them to prevent them from sticking during transport.
Final Thoughts + Call to Action
Jack Skellington Oreo Pops are a delightful treat that encapsulates the magic and fun of Halloween festivities. With a blend of convenience and creativity, they are sure to bring joy to any gathering. Try your hand at making these flavorful treats and don’t forget to share your creations! Make your celebrations even sweeter by incorporating more of your favorite desserts, such as Oreo cheesecake. Happy Halloween!
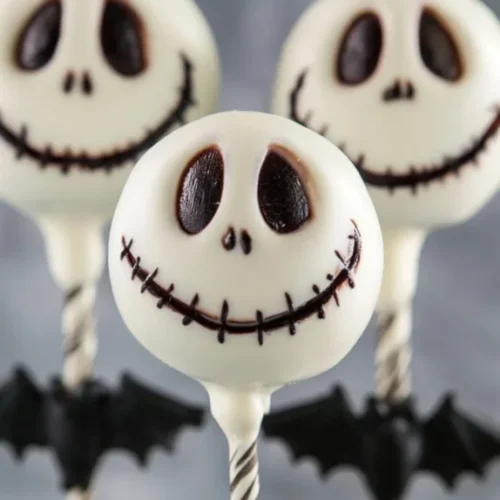
Jack Skellington Oreo Pops
Delightful Halloween treats combining Oreos and white chocolate, decorated with creativity for a whimsical presentation.
Ingredients
Main Ingredients
- 24 pieces Oreos Base for pops
- 12 oz White chocolate Coating and sweetness
- 1 tbsp Coconut oil Thin coating agent
- 12 pieces Lollipop sticks For easy handling
Decorative Ingredients
- 4 pieces Edible markers Decoration for details
- 1 cup Black royal icing Features, eyes, details
- 12 pieces Chocolate bats Creative embellishments (optional)
Instructions
Preparation
- Gather all your ingredients and supplies. Prepare a baking sheet lined with parchment paper.
- Insert lollipop sticks into the cream-filled side of each Oreo cookie.
Chocolate Coating
- In a microwave-safe bowl, combine the white chocolate melts with coconut oil, and heat in short intervals, stirring until smooth.
- Allow the melted chocolate to cool slightly before dipping each Oreo pop completely.
- Place the coated pops on the prepared baking sheet and refrigerate for about 10 minutes or until set.
Decoration
- Once chocolate has set, use edible markers to draw faces on the pops.
- Decorate with black royal icing for eyes, nostrils, and any additional details.
- Attach chocolate bats if desired and allow icing to harden at room temperature for an hour or two.
Notes
Customize designs for different occasions and keep pops in an airtight container to maintain freshness.