
Follow Me On Social Media!


Crispy Chicken Wrap

Crispy Chicken Wrap
Crispy Chicken Wrap is not just another meal; it’s an experience that combines flavors, textures, and convenience all into one delightful package. Whether you’re in a rush or looking for something satisfying to serve your family, this wrap does it all. Imagine crispy, golden-brown chicken enveloped in a warm tortilla, complemented by fresh vegetables and creamy dressing—what’s not to love? This recipe is perfect for lunch, dinner, or even meal prep, and it’s guaranteed to be a hit with everyone at the table.
Why You’ll Love It
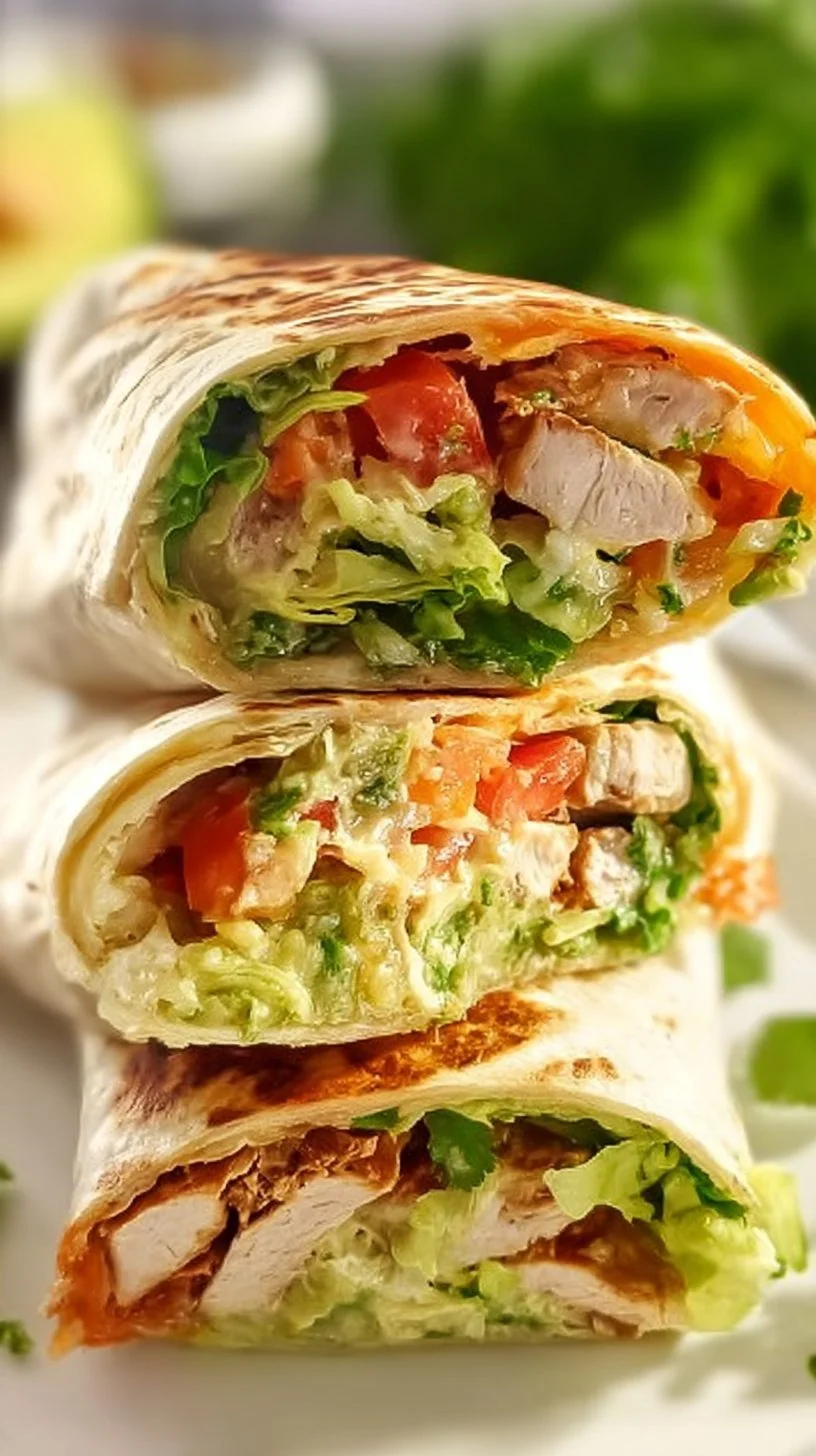
When it comes to meals that can please the entire family, the Crispy Chicken Wrap stands out for several reasons. First and foremost, it brings the crunch. Biting into that perfectly baked chicken gives you a satisfaction that’s hard to beat. Not only does the wrap taste incredible, but it also offers a versatile canvas. You have the freedom to make your wrap just the way you like it, from the choice of sauces to the types of veggies.
Additionally, this wrap is a wonderful way to sneak in some extra nutrients. Adding fresh lettuce, juicy tomatoes, and perhaps some avocado provides much-needed vitamins and minerals, which is especially important in meals tailored for growing kids. The fact that it’s easy to prepare adds to its charm; you can have a delicious, homemade meal ready in less than an hour.
Moreover, the Crispy Chicken Wrap is fantastic for on-the-go eating. Whether you’re heading to work or running errands, it’s a wrap that you can hold in one hand, making it a practical choice for busy lifestyles. Plus, it’s ideal for meal prepping, allowing you to whip up several at once and store them for later, all while saving time and effort in the kitchen.
Finally, the Crispy Chicken Wrap is incredibly customizable. You can adjust the ingredients to suit your preferences, whether you prefer a spicy kick or a classic flavor profile. This aspect of the dish allows it to become a staple in your household, as everyone can enjoy their version trapped inside a yummy tortilla!
Ingredients
- 2 chicken breasts
- 1 teaspoon smoked paprika
- Salt and pepper to taste
- 1 cup breadcrumbs
- 4 medium tortilla wraps
- 1 cup shredded lettuce
- 1 cup diced tomatoes
- 1 cup shredded cheese (cheddar or mozzarella)
- 1/2 cup mayonnaise or your favorite wrap sauce
When preparing your crispy chicken wrap, gather all the ingredients to make the process much smoother. Start with boneless, skinless chicken breasts, which are not only easy to work with but also cook evenly. You’ll want to season these with a teaspoon of smoked paprika for a rich flavor, along with salt and pepper to ensure the chicken thrives in taste. To give the chicken a crunchy, golden exterior, use about a cup of breadcrumbs, which you’ll coat the chicken with before baking.
For the wrap itself, choose four medium-sized tortilla wraps that can hold your fillings without breaking. To add a fresh and crisp texture to your wrap, gather about a cup of shredded lettuce and a cup of diced tomatoes. These veggies balance the richness of the chicken very well. Shredded cheese, like cheddar or mozzarella, adds creaminess and flavor—prepare at least one cup to sprinkle inside. Finally, consider a half cup of mayonnaise or your favorite wrap sauce to add moisture and flavor.
How to Make Crispy Chicken Wrap
{image_template}
Step 1
Begin by preheating your oven to 400°F (200°C). The high temperature helps achieve that delectable crispy texture we’re aiming for. While the oven warms up, season the chicken breasts generously with a teaspoon of smoked paprika, alongside salt and pepper to taste. You want to make sure the seasoning penetrates the meat, enhancing its flavor profile. Once seasoned, coat each chicken breast in breadcrumbs, ensuring that they are evenly covered for that perfect crunch later on.
Step 2
Next, place the coated chicken breasts on a baking tray lined with parchment paper. This step is crucial because it prevents sticking and makes for easier cleanup afterward. Space them out so that they cook evenly and become beautifully golden brown. Then, transfer the tray to the preheated oven and allow the chicken to bake for 20-25 minutes. During this time, the heat will work its magic, leaving you with crispy chicken that is fully cooked but still juicy inside.
Step 3
While the chicken is baking, it’s time to prepare your wrap fillings. Take this opportunity to chop some fresh salad ingredients. Start by rinsing and shredding one cup of fresh lettuce. You can use romaine for crunch or iceberg for traditional taste. Then, dice some tomatoes until you have a full cup, making sure they are juicy yet firm. Fresh vegetables make all the difference in a wrap, adding both flavor and nutrition. Once you’ve got your veggies ready, you can even set them aside for assembling later.
Step 4
As soon as the chicken is done baking, let it rest for about five minutes. This resting time allows the juices to redistribute, making for a more succulent bite. After resting, slice the chicken breasts into strips, making them easy to incorporate into your wrap. Now comes the fun part: assembling your crispy chicken wrap. Lay a tortilla flat on a clean surface and start layering with the shredded lettuce, diced tomatoes, and shredded cheese. Place the sliced chicken right on top of the veggies, then drizzle generously with mayonnaise or your choice of dressing. Wrap it tightly, tucking in the sides as you roll, and serve immediately or set aside for meal prep.
Directions
Begin by preheating your oven to 400°F (200°C). As the oven heats, season the chicken breasts with smoked paprika, just a pinch of salt, and freshly ground black pepper to taste. After seasoning, coat the chicken thoroughly in breadcrumbs, ensuring every inch is covered. Line a baking tray with parchment paper and arrange the coated chicken in a single layer before placing it in the oven. Bake for about 20-25 minutes, or until the chicken turns a beautiful golden brown and is cooked through.
While the chicken is baking, you’ll want to prepare the other ingredients that will fill your wrap. Start by chopping fresh lettuce into bite-sized pieces, and dice the tomatoes as well. These fresh ingredients will add a nice crunch and flavor to your wrap. After the chicken finishes baking, allow it to rest for several minutes before slicing into strips. This resting period is essential to keep the chicken juicy. To assemble your wrap, lay a tortilla flat and layer it with fresh lettuce, diced tomatoes, shredded cheese, and the sliced chicken. Drizzle with mayonnaise or your favorite sauce, roll the wrap tightly, making sure to tuck in the sides, and serve immediately, or wrap it up for meal prep.
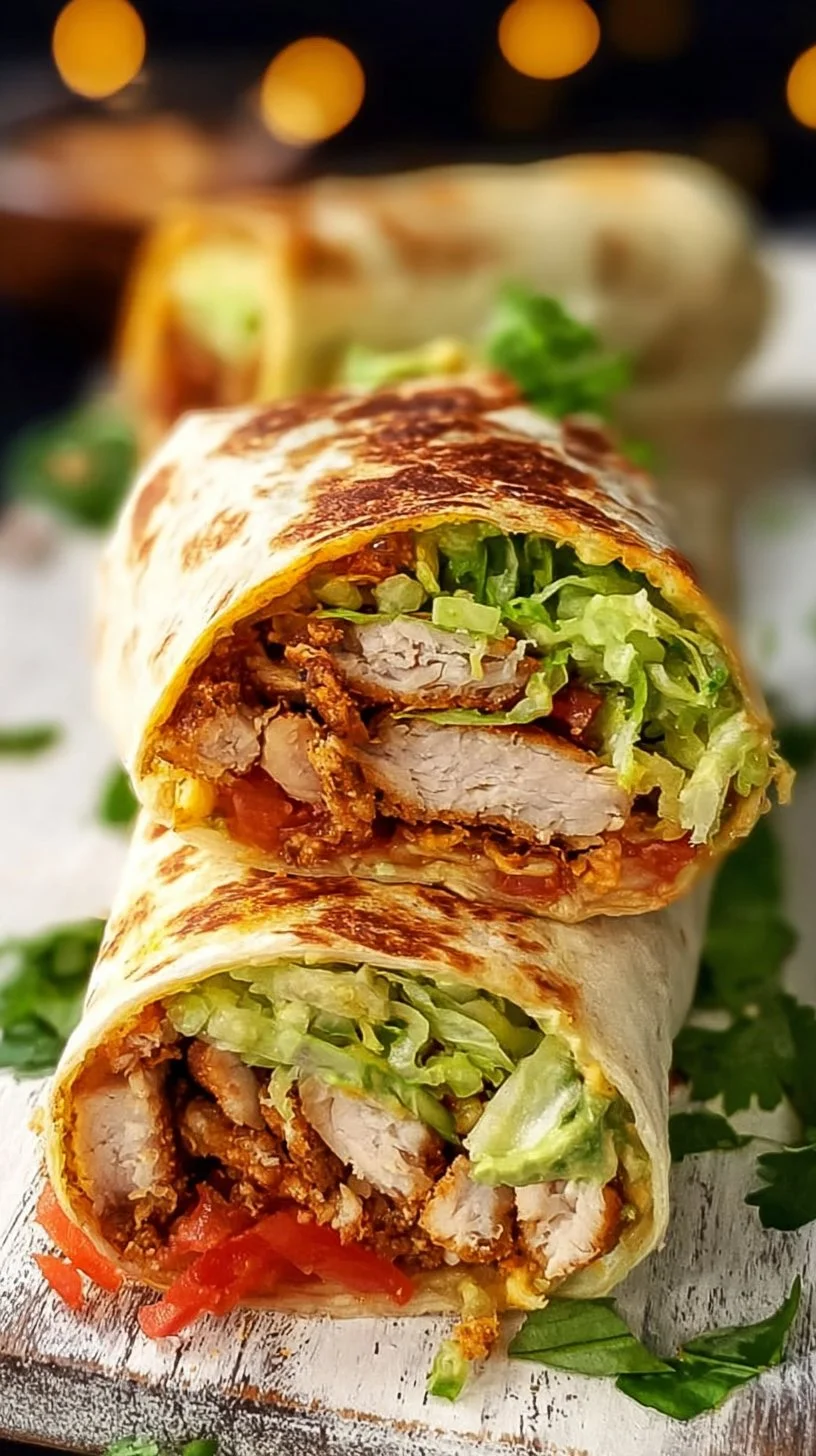
Helpful Notes
When making your crispy chicken wrap, there are a few tips to ensure the best results. First, if you prefer a lighter alternative, consider using panko breadcrumbs; they provide an even crispier texture compared to standard breadcrumbs. Feel free to experiment with different spices in your coating; garlic powder, onion powder, or even a dash of cayenne for some heat will enhance the flavor!
Additionally, you can customize your wrap by incorporating your favorite vegetables. Think of adding bell peppers, cucumbers, or olives to broaden the flavors. If you’re looking for a vegetarian alternative, substitute the chicken with grilled tofu or portobello mushrooms.
Make an extra batch of chicken and store it for up to three days in the refrigerator to simplify your meal prep. You can also prepare the vegetables in advance, just keep them in an airtight container.
Storage & Reheating Tips
If you find yourself with any leftover crispy chicken wraps, don’t worry! They store well in the refrigerator. Wrap them in foil or plastic wrap and keep them in an airtight container to maintain freshness. Your leftovers can last for up to three days. If you’d like to freeze them, it’s best to individually wrap each one in plastic and then pop them in a freezer-safe bag. In this way, they can last for up to a month in the freezer, making them easy to grab for last-minute meals.
When it comes time to reheat, you can either microwave the wraps or bake them in the oven to restore some of that crispy texture. If you’re microwaving, be sure to uncover them to prevent the wrap from becoming too chewy. If you’re reheating in the oven, preheat it to 350°F (175°C) and bake for about 10-15 minutes, until warmed through. Enjoy your wraps just as deliciously as when they were first made!
FAQs
What type of chicken is best for wraps?
For crispy chicken wraps, boneless, skinless chicken breasts are ideal as they cook evenly and are easy to slice. Thighs can also work but will give a slightly different texture.
Can I use different sauces?
Absolutely! While mayonnaise is a classic choice, you can opt for ranch dressing, honey mustard, buffalo sauce, or any sauce that complements the flavors you enjoy.
How can I make this dish healthier?
To make your crispy chicken wrap healthier, consider using whole grain tortillas and reducing the amount of cheese. Additionally, loading up on fresh veggies increases the nutritional value.
Is it possible to prepare this ahead of time?
Yes, you can prep all the ingredients a day in advance. Just store them in separate containers in the fridge. Assemble the wraps just before serving for the best texture.
Can I cook the chicken in an air fryer?
Yes, using an air fryer is a great option for making crispy chicken. Cook the chicken at 380°F (193°C) for about 15-20 minutes, flipping halfway through for even crispness.
What can I serve with crispy chicken wraps?
Some tasty side options include sweet potato fries, a mixed green salad, or even some homemade coleslaw for a crunchy complement.
Can I use leftovers for other recipes?
Definitely! Leftover chicken can be used for salads, pasta dishes, or even added to soups for extra flavor. Your crispy chicken is versatile beyond the wrap!
Conclusion + CTA
In conclusion, the Crispy Chicken Wrap is a delightful meal that combines great flavors and textures, making it perfect for any occasion. Whether you’re serving it at a family dining table or on the go, this wrap is sure to please. So why not try your hand at making these delicious wraps today? Gather your ingredients, follow the steps outlined, and enjoy a satisfying meal that you can be proud of. Make it your own, and trust me—you’ll want to keep this recipe in your meal rotation for years to come! Don’t forget to share your culinary creations with friends and family; they’ll definitely want in on the deliciousness too!
Crispy Chicken Wrap
A delicious and satisfying wrap filled with crispy chicken, fresh vegetables, and creamy dressing, perfect for lunch, dinner, or meal prep.
Ingredients
For the Chicken
- 2 pieces boneless, skinless chicken breasts Ideal for even cooking and easy slicing.
- 1 teaspoon smoked paprika Adds a rich flavor to the chicken.
- to taste Salt and pepper Use to season the chicken.
- 1 cup breadcrumbs For a crunchy coating.
For the Wrap
- 4 medium tortilla wraps Select size that can hold ample fillings.
- 1 cup shredded lettuce Add fresh taste and crunch.
- 1 cup diced tomatoes Provide freshness and moisture.
- 1/2 cup mayonnaise or your favorite wrap sauce To add moisture and flavor.
- 1 cup shredded cheese (cheddar or mozzarella) Optional for creaminess and flavor.
Instructions
Preparation
- Preheat your oven to 400°F (200°C).
- Season the chicken breasts with smoked paprika, salt, and pepper.
- Coat each chicken breast in breadcrumbs.
- Place the coated chicken on a baking tray lined with parchment paper.
Cooking
- Bake the chicken for 20-25 minutes until golden brown and cooked through.
Assembly
- While the chicken is baking, prepare the wrap fillings by shredding the lettuce and dicing the tomatoes.
- Once the chicken has rested for about five minutes, slice it into strips.
- Lay a tortilla flat and layer with shredded lettuce, diced tomatoes, shredded cheese, and sliced chicken.
- Drizzle with mayonnaise or your choice of dressing, wrap tightly, and serve immediately.
Notes
For extra crispy texture, consider using panko breadcrumbs. Customize your wrap with different veggies like bell peppers or cucumbers. Store leftovers in an airtight container for up to three days.