Follow Me On Social Media!


No Bake Chocolate Berry Tart (Gluten Free & Vegan)

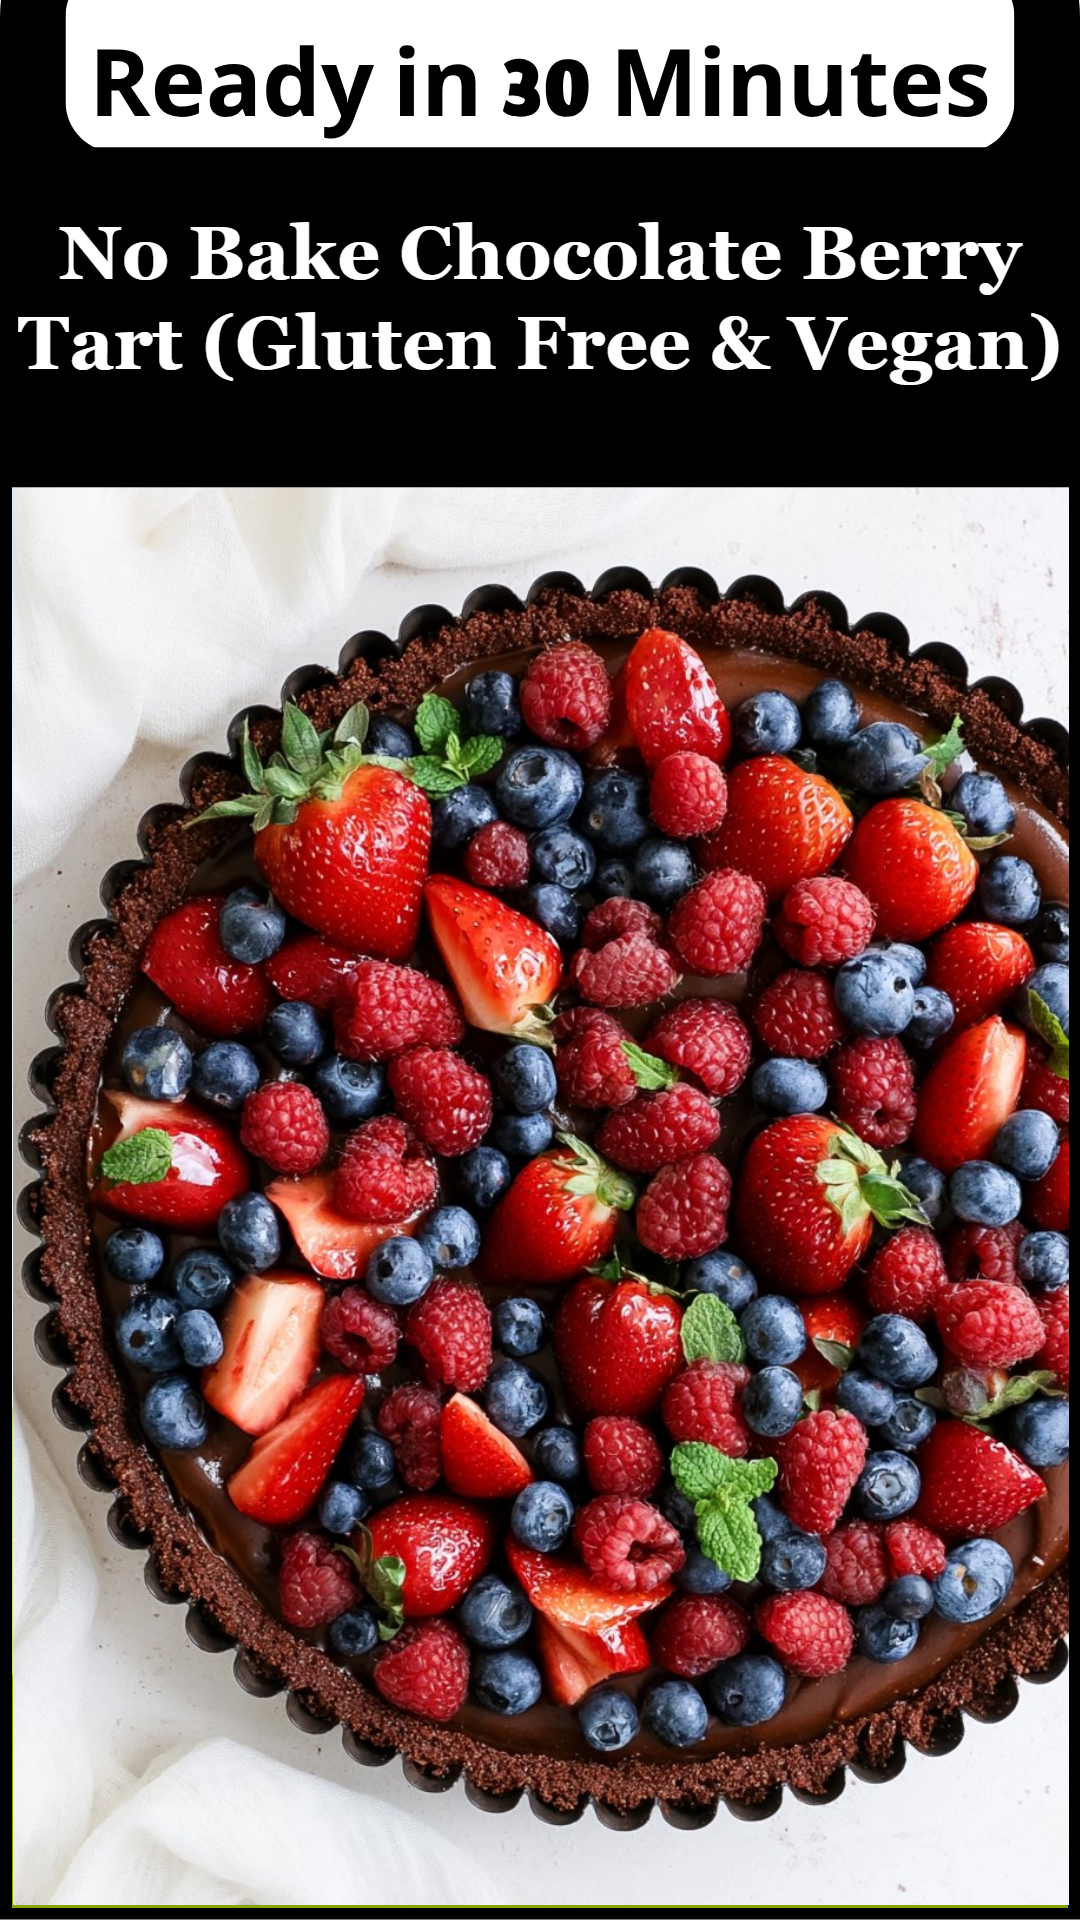
No Bake Chocolate Berry Tart (Gluten Free & Vegan) is a delightful dessert that combines the rich decadence of chocolate with the vibrant freshness of berries. This tart is not just a treat for your taste buds; it’s also an eye-catching centerpiece for any gathering. Whether you’re hosting a dinner party or enjoying a quiet evening at home, this tart is sure to impress. Moreover, it’s a guilt-free indulgence that anyone—regardless of dietary preferences—can enjoy. With a luscious chocolate filling nestled in a crunchy base, followed by a bright berry topping, every bite offers a symphony of flavors and textures. 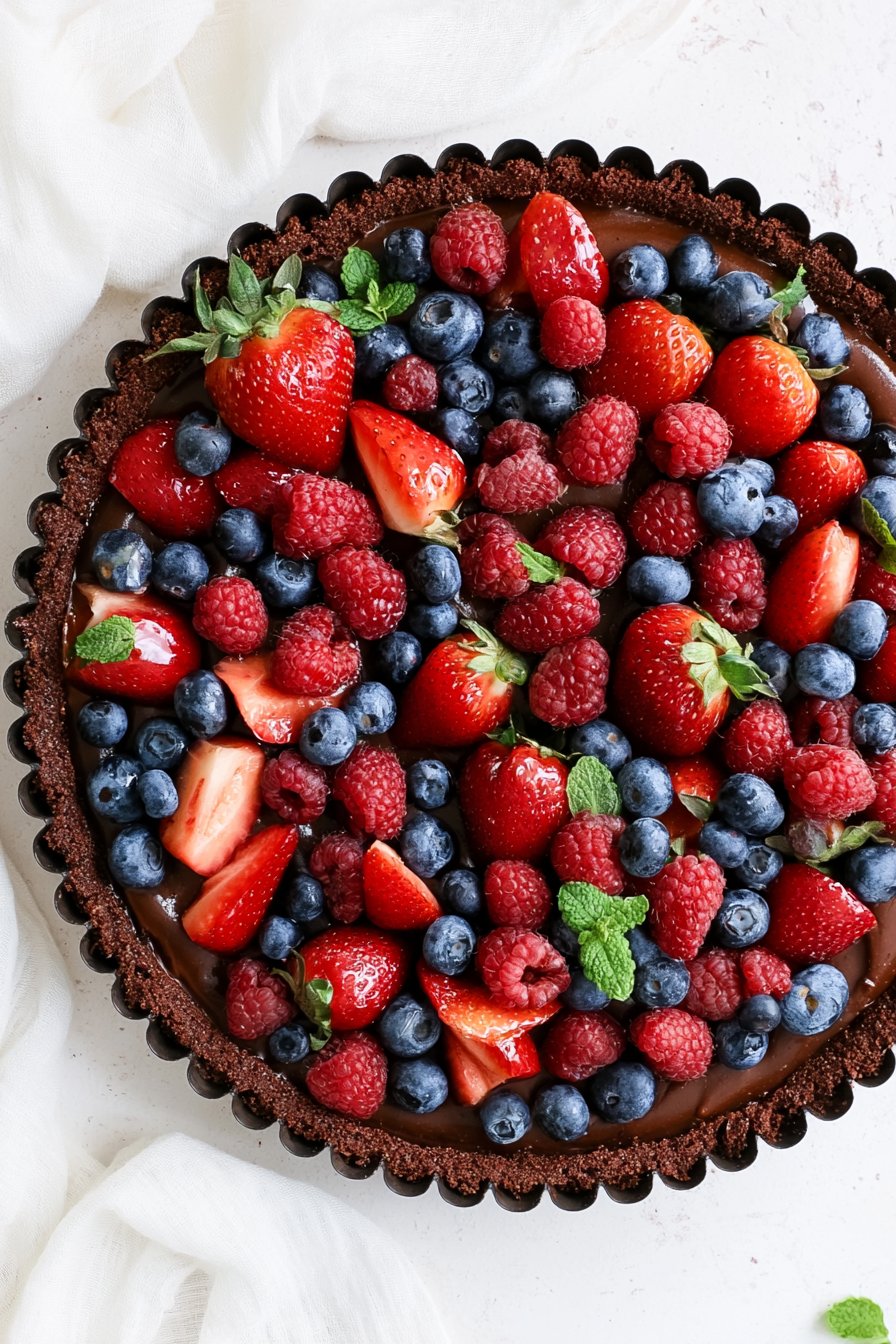
What Makes This Recipe Stand Out
What truly sets the No Bake Chocolate Berry Tart apart is its harmonious blend of taste and health benefits. The use of gluten-free and vegan ingredients makes it suitable for a variety of dietary needs without sacrificing flavor. Imagine sinking your fork into a slice of creamy chocolate goodness, paired with sweet and tangy berries that burst with freshness. Moreover, the simplicity of the no-bake method allows anyone to create this masterpiece without the need for complex techniques or extensive baking experience.
Emotional connections also come into play with this recipe. Sharing homemade desserts often creates lasting memories and fosters a sense of community. Picture gathering around the table with friends and family as you serve this beautiful tart—its inviting aroma and stunning presentation sparking conversation and smiles. The combination of chocolate and berries resonates well with many; it evokes a sense of indulgence while still feeling light and refreshing.
From a practical perspective, the tart is relatively quick to prepare, making it a perfect last-minute dessert option. You can assemble it in a matter of minutes, letting it chill in the fridge while you focus on other tasks. Furthermore, this recipe is versatile enough to accommodate a variety of ingredients based on seasonal availability. No wonder this No Bake Chocolate Berry Tart is gaining popularity among food enthusiasts and health-conscious eaters alike!
Ingredient Breakdown
- Almond Flour: The primary ingredient that forms the base of the crust, adding a nutty flavor while keeping the tart gluten-free.
- Coconut Oil: This acts as a binding agent in the crust, providing healthy fats and a smooth texture.
- Pure Maple Syrup: A natural sweetener that enhances the flavor of the crust while adding moisture.
- Cocoa Powder: The star ingredient in the tart filling, bringing a rich chocolate flavor that satisfies your cravings.
- Silken Tofu: A key component in the filling that contributes creaminess without the dairy, making it vegan-friendly.
- Dark Chocolate: Melted and mixed into the filling, this ingredient gives the tart its luxurious texture and deep chocolate taste.
- Fresh Berries: Used for topping, these fruits provide a burst of color and flavor, from strawberries to blueberries, varying with the seasons.
- Vanilla Extract: A splash of this adds depth to the flavor profile of the tart, balancing the sweetness of the chocolate and the tartness of the berries.
Understanding how each ingredient works together elevates the No Bake Chocolate Berry Tart beyond a simple dessert. The almond flour gives a delightful crunch while coconut oil binds everything seamlessly. Pure maple syrup sweetens the crust without overwhelming it, allowing the chocolate and berries to shine. Cow milk is replaced with silken tofu, providing all the creaminess needed without any dairy. The melted dark chocolate intermingles beautifully with the other filling components, creating a decadent outcome. For the topping, the freshness of seasonal berries not only enhances the visual appeal but also adds necessary acidity to balance the richness of the chocolate. Together, these ingredients come together to create a dessert that’s not just food; it’s a celebration of flavors.
| Ingredient | Purpose |
|——————-|——————————————|
| Almond Flour | Provides crunch and gluten-free base |
| Coconut Oil | Binds crust and adds healthy fats |
| Pure Maple Syrup | Natural sweetener for flavor |
| Cocoa Powder | Main chocolate flavor |
| Silken Tofu | Creates creamy vegan filling |
| Dark Chocolate | Adds rich chocolate taste |
| Fresh Berries | Topping that adds freshness |
| Vanilla Extract | Enhances overall flavor |
Step-by-Step Preparation for No Bake Chocolate Berry Tart
Step One
To kick off this delicious No Bake Chocolate Berry Tart, start by preparing the crust. Combine almond flour and melted coconut oil, making sure to mix thoroughly until the consistency resembles damp sand. As you work these ingredients together, the natural oils from the coconut will merge seamlessly with the flour, giving you a cohesive mixture. Then, pour in the pure maple syrup, which serves as a natural sweetener and moisture component for the crust. Press the mixture firmly into a tart pan, ensuring an even layer that covers the bottom and sides adequately. Take your time to develop a smooth crust, as this forms the foundation of your dessert. Once evenly spread, place the pan in the refrigerator to set while you prepare the filling.
Step Two
Now that the crust is chilling, it’s time to move on to the chocolate filling. Start by melting dark chocolate in a heatproof bowl over simmering water, or use a microwave in short bursts, stirring in between to avoid burning. Once melted, set it aside to cool slightly while you blend the silken tofu. Using a food processor, combine the silky texture of tofu with the unsweetened cocoa powder and a touch of vanilla extract. Blend until it’s completely smooth and creamy, ensuring no lumps remain. Gradually add in the melted chocolate, pulsing to create a homogeneous mixture. This filling will be rich, creamy, and loaded with chocolate flavor, beautifully balancing the sweetness of the crust.
Step Three
After creating the luscious filling, retrieve your crust from the refrigerator. Pour the silky chocolate mixture into the prepared tart shell, smoothing it out evenly with a spatula. Make sure to fill the crust all the way up to the edges, creating a delightful layer of chocolate goodness. Once filled, tap the pan gently on the counter to release any air bubbles and ensure the mixture settles nicely into the crust. Cover the tart with plastic wrap to prevent it from absorbing any odors from your refrigerator, and allow it to chill for at least four hours, if not overnight. This resting period is essential, as it allows the filling to firm up properly.
Step Four
The final step involves adding the finishing touches with fresh berries. After the tart has chilled, carefully remove it from the refrigerator. Arrange your choice of berries, such as strawberries, blueberries, or raspberries, on top of the chocolate filling. Be as artistic as you wish; after all, a beautifully topped dessert is a feast for the eyes! If desired, you can drizzle a bit more melted chocolate on top or sprinkle with some shredded coconut for added texture and visual appeal. Once decorated, slice the tart into wedges, serve it on individual plates, and get ready to enjoy every indulgent bite. 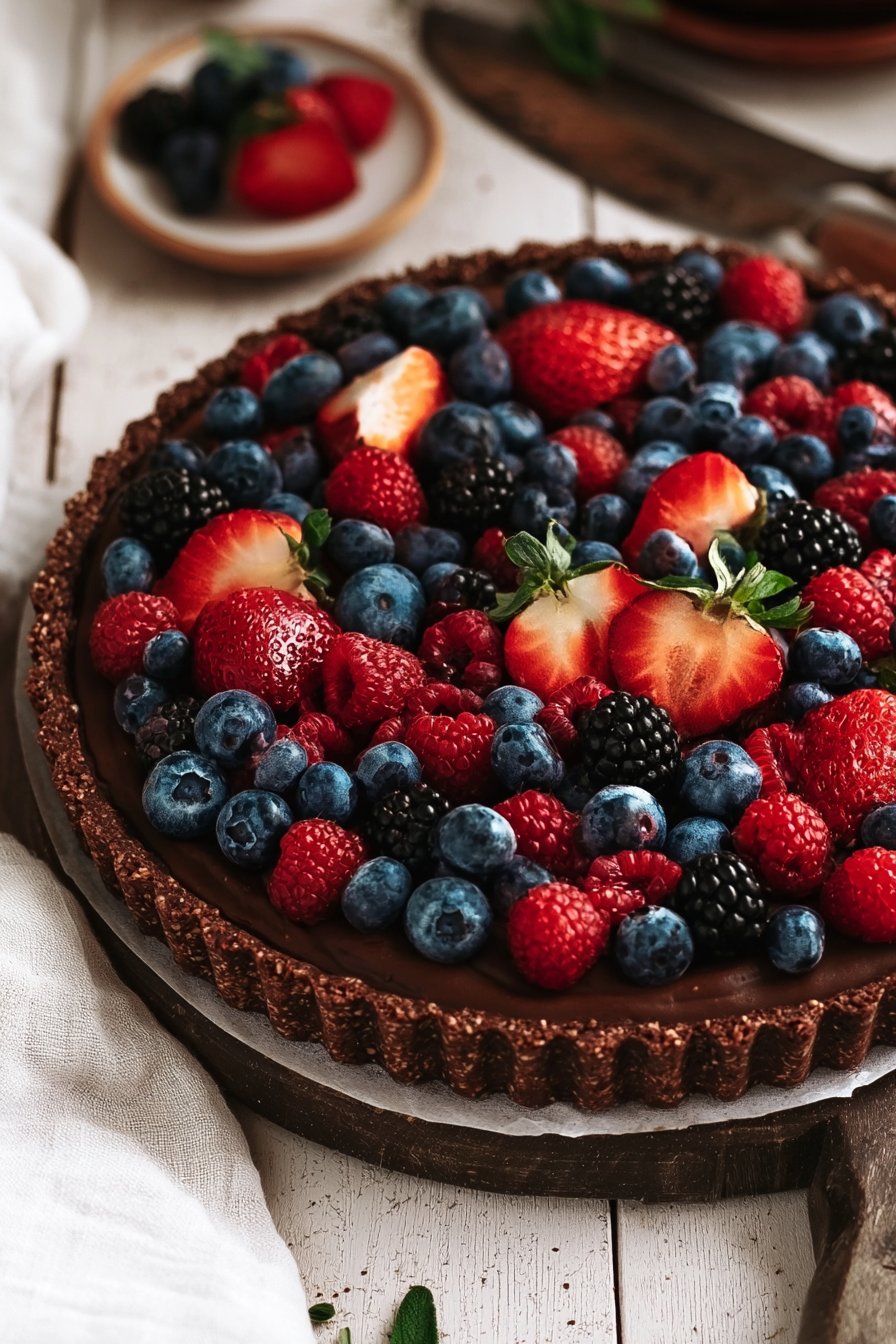
Full Cooking Directions
First, Make The Crust:
To launch your culinary adventure, begin by preparing the crust. In a mixing bowl, combine almond flour and melted coconut oil, mixing them thoroughly until they achieve a sand-like consistency. Then add a little pure maple syrup for additional sweetness and moisture. Press this mixture firmly into a tart pan, ensuring it covers both the bottom and the sides evenly. This blend of textures creates a deliciously crunchy base that perfectly complements the creamy filling. Now, place the pan in the refrigerator while you turn your attention to the decadent chocolate filling.
Then, Make The Chocolate Filling:
The next step involves the exciting part—creating the rich chocolate filling. Melt the dark chocolate using your preferred method, ensuring not to overheat it. Let it cool slightly, as you want this chocolate to meld just right with the other ingredients. Meanwhile, in your food processor, blend silken tofu with cocoa powder and vanilla extract until it forms a smooth paste. The tofu creates a creamy texture that is both satisfying and healthy. Once smooth, incorporate the melted chocolate into this mixture. Blend again until you achieve a luxurious, creamy filling, ready to grace the tart shell.
For the Topping:
Now that your tart crust and filling are ready, retrieve the crust from the refrigerator and pour the chocolate filling into it, smoothing out the surface as you do so. Allow this dessert to chill for several hours—at least four is ideal. When you’re ready to serve, bring the tart out and arrange your fresh berries on top. This decorative touch enhances both the look and flavor of this delicious treat, providing a refreshing contrast to the creamy chocolate.
Pro Tips & Extra Guidance
When preparing the No Bake Chocolate Berry Tart, keep a few expert tips in mind for optimal results. First, ensure that the silken tofu is thoroughly blended for a completely smooth filling—no lumps allowed! If you want a slightly sweeter filling, consider adjusting the amount of maple syrup to your liking. Additionally, try using different types of berries depending on what’s in season: blackberries, strawberries, or raspberries all work wonderfully.
You might also consider adding a layer of crushed nuts on top for an extra crunch or perhaps a handful of chocolate shavings to intensify the chocolate flavor. If you find yourself with leftover tart, simply store it in an airtight container in the fridge!
Lastly, if you want to boost the health factor even further, consider making a nut-based topping with whipped coconut cream instead of using chocolate. It’s a fantastic way to lighten up a rich dessert while keeping its essence intact.
Best Practices for Storing & Reheating
Storing the No Bake Chocolate Berry Tart is straightforward. Keep it in the refrigerator, tightly covered with plastic wrap or in an airtight container. Proper storage will maintain its freshness for up to five days, making it a perfect make-ahead option for dinner parties or holiday gatherings.
If you want to freeze the tart for longer storage, slice it first and wrap each slice separately in freezer-safe foil or plastic wrap. When you’re ready to enjoy it again, let it thaw overnight in the refrigerator for the best texture. Be cautious, however, when it comes to reheating; since the tart is made with ingredients that are best served chilled, there’s no need to reheat it at all. Just let it sit at room temperature for a short while before serving, enhancing its creamy texture and flavor.
Common Questions Answered
What can I substitute for almond flour?
If you don’t have almond flour, you can use other nut flours like cashew flour or even coconut flour. However, keep in mind that coconut flour absorbs more moisture, so you’ll need to adjust the amount accordingly in your crust. A 1:1 ratio typically works well for these alternatives.
Can I use a different sweetener besides maple syrup?
Certainly! Agave nectar, honey (if not sticking strictly to vegan), or even stevia can be excellent alternatives. Just note that the sweetness levels may differ, so taste-testing is useful to achieve your desired flavor balance.
How do I get the tart out of the pan easily?
To release the tart from the pan with minimal fuss, ensure you’ve greased it lightly before pressing in the crust. Additionally, using a tart pan with a removable bottom makes it easy to lift the dessert out when it’s time to serve.
Is there a way to make the tart more chocolatey?
For an extra chocolate kick, feel free to add chocolate chips into the filling or layer the chocolate crust with melted chocolate before adding the filling. You can also drizzle melted chocolate over the top before adding the berries.
How can I make this recipe more kid-friendly?
You can tone down the chocolate by reducing the cocoa powder slightly or adding more sweetener into the filling. Additionally, make the topping colorful by letting kids pick their favorite berries for a fun and engaging dessert-prepping session.
Can I make this recipe ahead of time?
Absolutely! The No Bake Chocolate Berry Tart can be made a day or two in advance. Just be sure to store it properly in the fridge; this will actually allow the flavors to meld beautifully over time.
Can I use frozen berries for the topping?
While fresh berries offer a delightful pop, frozen berries can work in a pinch. Just remember to thaw them beforehand and drain any excess liquid to prevent sogginess on the tart.
Final Thoughts + Call to Action
No Bake Chocolate Berry Tart (Gluten Free & Vegan) is a fantastic way to indulge your sweet cravings while adhering to healthier dietary choices. The combination of rich chocolate, creamy filling, and fresh berries not only satisfies but inspires. Trust us; it’s not every day you come across a dessert that pleases a crowd with diverse dietary needs while still being delightful and decadent.
So why wait? Gather the ingredients, and get started on your own No Bake Chocolate Berry Tart today. Your taste buds will thank you, and your friends and family will be awe-struck by the deliciousness. Don’t forget to share your experiences and tweaks as you share this delightful dessert with the world!
No Bake Chocolate Berry Tart
This stunning tart features a rich chocolate filling and a crunchy gluten-free crust, topped with fresh berries for a guilt-free indulgence that everyone can enjoy.
Ingredients
For the crust
- 1 cup Almond Flour Provides crunch and gluten-free base
- 1/4 cup Coconut Oil, melted Binds crust and adds healthy fats
- 2 tablespoons Pure Maple Syrup Natural sweetener for flavor
For the filling
- 1/2 cup Cocoa Powder Main chocolate flavor
- 1 block Silken Tofu Creates creamy vegan filling
- 1/2 cup Dark Chocolate, melted Adds rich chocolate taste
- 1 teaspoon Vanilla Extract Enhances overall flavor
For the topping
- 2 cups Fresh Berries (e.g., strawberries, blueberries) Adds freshness and visual appeal
Instructions
Preparation
- In a mixing bowl, combine almond flour, melted coconut oil, and pure maple syrup until the mixture resembles damp sand. Press firmly into a tart pan to form the crust and refrigerate.
- Melt the dark chocolate and let it cool slightly. In a food processor, blend silken tofu, cocoa powder, and vanilla extract until smooth. Gradually add the melted chocolate and blend until creamy.
- Pour the chocolate filling into the crust, smoothing it out. Tap the pan to release air bubbles and cover with plastic wrap. Chill for at least 4 hours or overnight.
- After chilling, arrange the fresh berries on top of the tart as desired, and serve.
Notes
Store leftovers in the refrigerator for up to 5 days or freeze slices wrapped in foil or plastic wrap.