
Follow Me On Social Media!


Spooky Skeleton Oreos

Spooky Skeleton Oreos are a delightful treat that blend deliciousness with a hauntingly fun twist, perfect for Halloween or any spooky gathering. These chocolate-dipped Oreos not only satisfy your sweet tooth but also serve as whimsical decorations that can enchant guests of all ages. They’re simple to make, bringing joy to both kids and adults alike as they decorate the cookies. If you’re looking for a festive way to indulge, you might also enjoy exploring other cake options like Peanut Butter Chocolate Layer Cake, which adds an extra layer of fun to your dessert table. 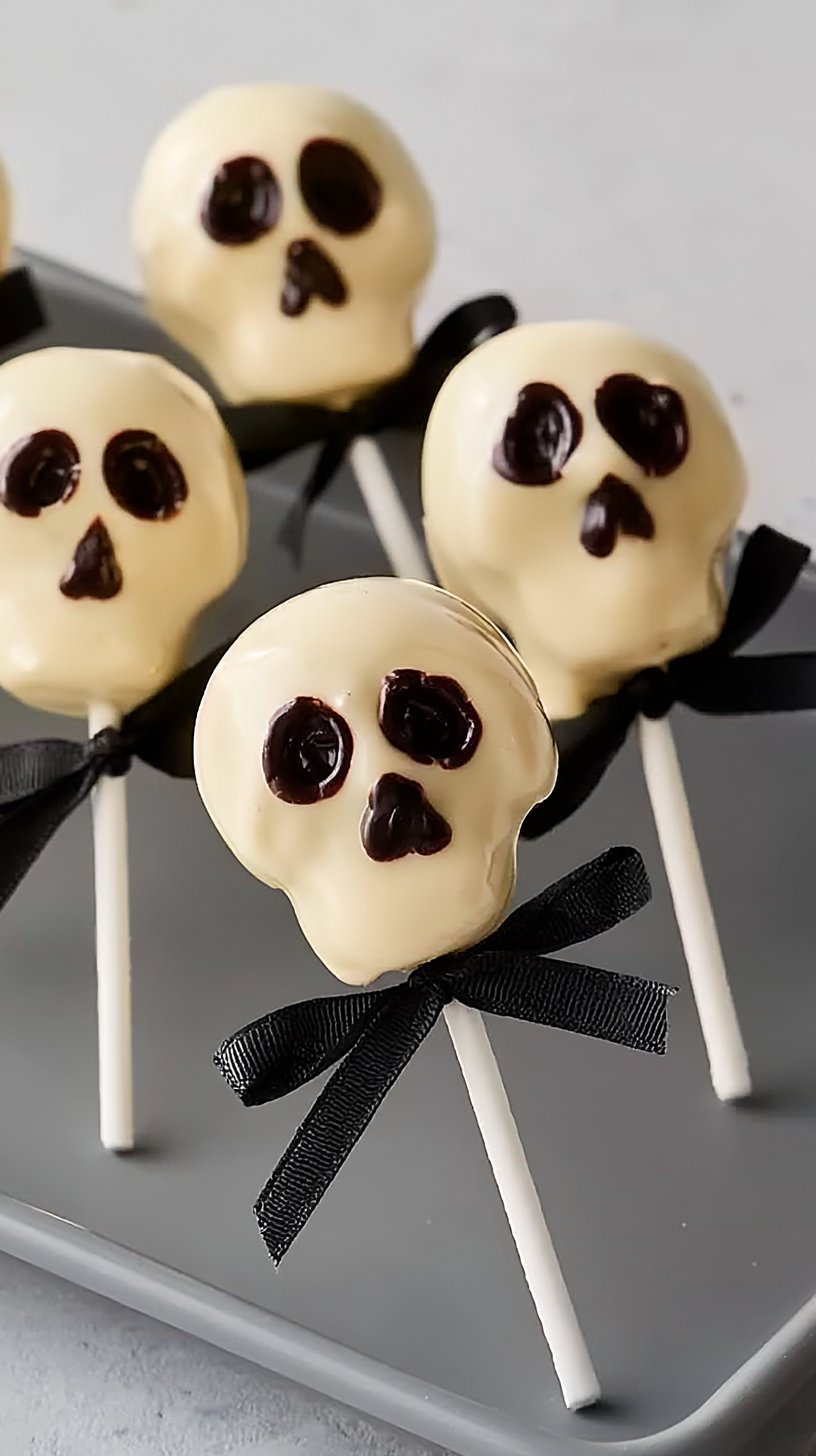
What Makes This Recipe Stand Out
Spooky Skeleton Oreos stand out not just for their adorable and festive appearance, but also for their versatility. The creamy filling of the Oreo combined with the rich chocolate coating creates a flavor experience that is both delightful and satisfying. They appeal to both the young and the young-at-heart, making them a perfect addition to Halloween parties, school events, or just a fun weekend baking activity. Moreover, they offer an opportunity for creativity, allowing you to personalize the skeleton designs however you wish. You may also find Oreo Cheesecake useful.
The fun doesn’t stop with the decorating either; these treats can also be tailored to fit various diets or preferences. For example, swap out the traditional Oreos for gluten-free versions, or experiment with different types of chocolate, like dark or white chocolate. For those with a serious chocolate craving, check out this recipe for gooey fudge brownies for a different dessert option that’s sure to impress.
Ingredient Breakdown
Before beginning this entertaining baking adventure, it’s essential to gather all necessary ingredients. Each component plays a vital role in achieving the perfect festive treat:
• Oreo cookies: Base flavor, crunch
• Chocolate chips: Coating, sweetness
• White chocolate: Skeleton decoration
• Candy eyes: Character features
• Black icing: Skeleton details
• Parchment paper: Non-stick surface
Let’s dive deeper into the ingredient roles. The star of our show, Oreo cookies, provide the foundational flavor and delightful crunch. The chocolate chips, melted and used for coating, add a rich sweetness that complements the sandwich cookie perfectly. White chocolate is used to create those adorable skeleton faces, adding a contrast that sharpens the overall aesthetic. Candy eyes are essential for giving each Oreo its personality, while black icing expertly outlines the skeleton features. Lastly, the parchment paper ensures easy removal of the Oreos after dipping, preventing any mess.
Step-by-Step Preparation for Spooky Skeleton Oreos
{image_template}
Step One
Begin by preparing your workstation for the fun ahead. Gather all your ingredients and set up a double boiler or microwave for melting chocolate. For a creative twist, you can also use colorful candy melts instead of traditional chocolate for a more vibrant look. Start by melting the chocolate chips gently, ensuring you stir continuously until the mixture is smooth and melted completely.
Step Two
Once your chocolate is ready, dip each Oreo into the melted mixture carefully. Ensure that the cookie is fully coated, using a fork to lift it out gently. This will allow any excess chocolate to drip off before placing them on a baking sheet lined with parchment paper. The key here is to make sure all areas of the Oreo are covered to create a smooth, even appearance.
Step Three
After you’ve coated the Oreos with chocolate, it’s time to let them set slightly. Allow them to rest for about 10-15 minutes until the outer layer begins to firm up but is still slightly soft. This is a crucial step for decorating, as it allows the white chocolate to adhere better to the base layer.
Step Four
While the outer chocolate layer is still soft, it is time to create the skeleton faces. Melt your white chocolate in the same manner as before, and using a piping bag or a small spoon, carefully make skeleton designs on each Oreo. Don’t forget to place candy eyes for added charm and character. Let these decorations set completely, which may take an additional 30 minutes, before serving to your eager guests.
Full Cooking Directions
- Start by melting the chocolate in a microwave or double boiler.
- Dip each Oreo into the melted chocolate, ensuring it’s fully coated.
- Place the coated Oreos on a baking sheet lined with parchment paper.
- Allow the chocolate to set slightly.
- While the chocolate is still soft, use white chocolate to create skeleton faces on each Oreo. Use candy eyes for eyes and black icing to draw the skeleton features.
- Let the decorations set fully before serving. Enjoy your spooky treats!
Pro Tips & Extra Guidance
To ensure your Spooky Skeleton Oreos turn out perfectly, consider these expert tips. First, opt for high-quality chocolate for coating; it truly makes a difference in taste and meltability. If you’re feeling adventurous, try flavoring your melted chocolate with extracts like vanilla or peppermint to add another layer of taste.
Additionally, if you have leftover coated Oreos, store them in an airtight container in the refrigerator for freshness, but be careful not to stack them directly on top of each other to avoid smudging the designs. For variations, you can also use colored candy melts to change the aesthetic, such as bright green or purple for a Halloween vibe. For another snack idea that will have party guests raving, browse through this delicious recipe for No-Bake Blueberry Cheesecake!
Best Practices for Storing & Reheating
Spooky Skeleton Oreos are best enjoyed fresh, but proper storage can extend their lifespan significantly. First, allow them to cool completely after decorating. Then, place them in a single layer in an airtight container; if you have more than one layer, use parchment paper between them. Store them in the refrigerator to maintain their freshness, and they will last for about a week.
When it comes to reheating, it’s best not to microwave them as the chocolate will melt and the decorations will smudge. If you want to cheer them up before serving, you might try letting them return to room temperature naturally. This way, they’ll taste fresh without compromising their visual appeal.
Common Questions Answered
What kind of chocolate is best for dipping Oreos?
High-quality chocolate melts or chips work best, as they smoothen out easily and provide a rich taste.
Can I use different types of Oreos?
Absolutely! Feel free to experiment with flavored or seasonal varieties, such as pumpkin spice or mint.
How can I make the skeleton designs more intricate?
Try using edible glitter or colorful icing to enhance the designs. You can also draw on different expressions for each skeleton.
Do I need to put the Oreos in the refrigerator after decorating?
Yes, refrigerating helps set the decorations faster and retains the chocolate coatings.
Can these be made ahead of time?
Certainly! You can prepare them a few days in advance and store them in an airtight container as instructed earlier.
What if I have leftovers?
Store them properly in the fridge, and they can be enjoyed for up to a week.
What should I serve with them?
Pair these treats with themed beverages or offer a variety of snacks for a delightful Halloween spread. Consider adding a rich dessert like Brown Butter Chocolate Chip Cookies to your offerings for variety.
Final Thoughts + Call to Action
Spooky Skeleton Oreos are not just treats; they’re magical bites of joy that bring a festive spirit into your home. With their flavor and whimsical designs, these delightful cookies are sure to impress anyone who lays eyes on them. So gather your ingredients, unleash your creativity, and get ready to celebrate with this hauntingly fun recipe! Don’t forget to share your creations and enjoy the compliments that follow!

Spooky Skeleton Oreos
Delightful chocolate-dipped Oreos decorated like skeletons, perfect for Halloween or spooky gatherings.
Ingredients
Main Ingredients
- 12 pieces Oreo cookies Base flavor, crunch
- 1 cup Chocolate chips Coating, sweetness
- 1/2 cup White chocolate Skeleton decoration
- 1/4 cup Candy eyes Character features
- 1 tube Black icing Skeleton details
- 1 sheet Parchment paper Non-stick surface for setting
Instructions
Preparation
- Gather all ingredients and set up a double boiler or microwave for melting chocolate.
- Melt the chocolate chips gently, stirring continuously until smooth.
Coating
- Dip each Oreo into the melted chocolate, ensuring it is fully coated.
- Lift the Oreo out with a fork to allow excess chocolate to drip off, then place it on a baking sheet lined with parchment paper.
Setting
- Let the coated Oreos set for about 10-15 minutes until the outer layer begins to firm but is still slightly soft.
Decoration
- While the chocolate is still soft, melt the white chocolate and use it to create skeleton designs on each Oreo.
- Add candy eyes and use black icing to outline the skeleton features.
- Let the decorations set completely, which may take an additional 30 minutes, before serving.
Notes
Use high-quality chocolate for coating to enhance taste. Store in an airtight container in the refrigerator for up to a week. Consider using colorful candy melts for a vibrant look.