
Follow Me On Social Media!


Hello Fall – As the Leaves Turn | Easy Homemade Bread Recipes, Bread Making Recipes, Sweet Bread Recipes
Hello Fall – As the Leaves Turn | Easy Homemade Bread Recipes
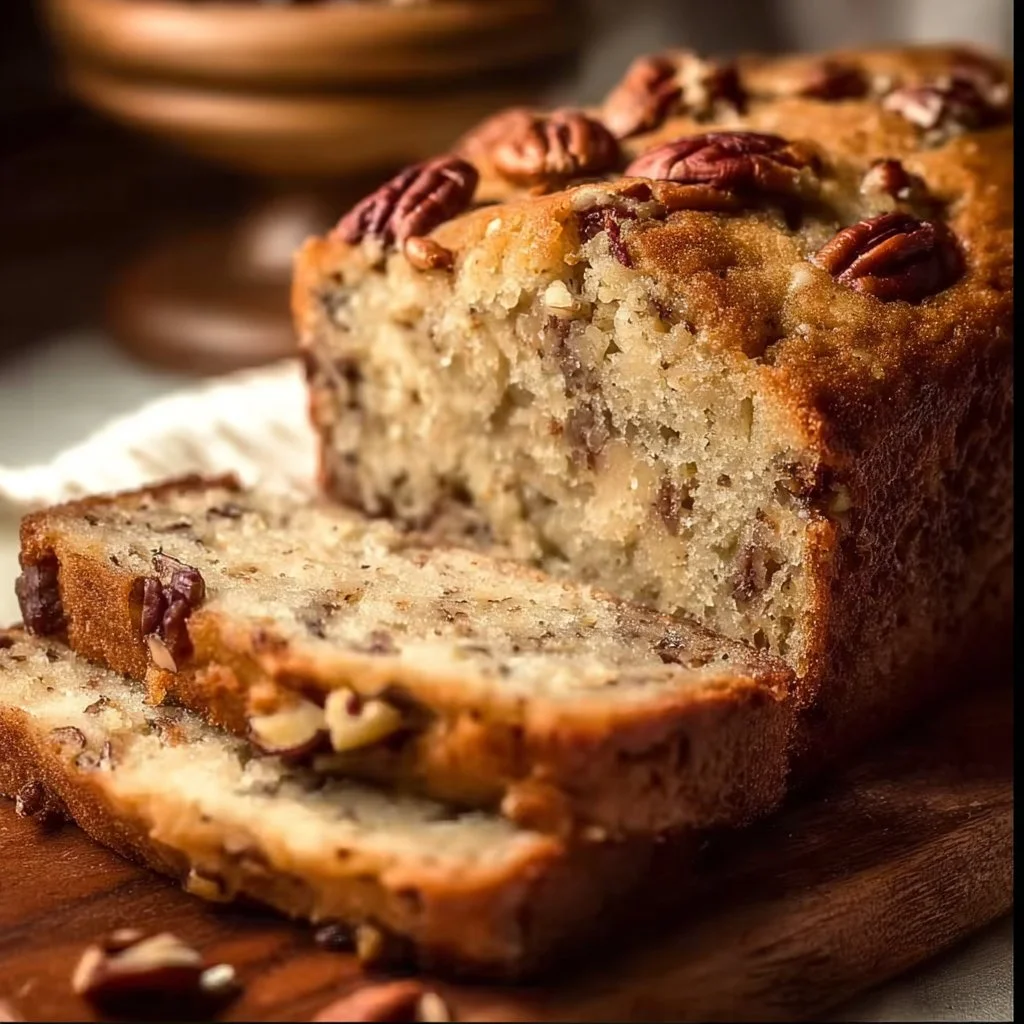
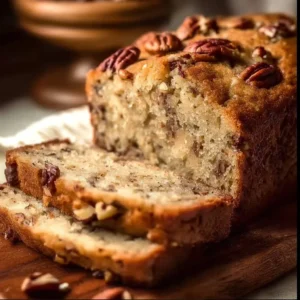
Hello Fall! As the leaves turn and the air becomes crisp, there’s nothing quite like the warm, comforting aroma of homemade bread wafting through your home. The essence of fall resonates in the act of baking, as it conjures feelings of togetherness, warmth, and the joy of sharing with friends and family. This cozy season beckons for recipes that bring hearts together over the table, and homemade bread tops that list. What better way to embrace the spirit of autumn than with easy homemade bread recipes? As we delve into the delightful world of kneading dough and watching bread rise, we will explore recipes that cater to all skill levels, ensuring everyone can partake in the timeless art of bread-making.
What Makes This Recipe Stand Out
This easy homemade bread recipe sets itself apart by combining simplicity with an extraordinary flavor profile that will make your taste buds sing. Firstly, it’s accessible; even if you’re a novice in the kitchen, the steps are straightforward and forgiving, making baking not just an activity, but a pleasure. The sensory experience of kneading the dough is therapeutic—a tactile reminder that you’re creating something delicious and nourishing from scratch.
Beyond ease, this bread captivates with its delightful texture. Each loaf is soft, fluffy, and just the right amount of crusty. This bread is perfect for accompanying hearty soups, spreading with butter or jam, or savoring simply, still warm from the oven. Additionally, autumn flavors can easily be woven into the dough or toppings, such as cinnamon or pumpkin spice, imparting a seasonal twist.
Ultimately, easy homemade bread recipes forge not just sustenance but memories—a sensory journey that invites collaboration in the kitchen and warmth in the home. It’s about coming together and embracing those beautiful fall moments, with the added bonus of a delicious homemade treat to share.
Ingredient Breakdown
- Warm Water: Essential for activating the yeast, warm water creates the perfect environment for fermentation, allowing your dough to rise beautifully.
- Active Dry Yeast: This is the magic ingredient, responsible for fermentation and giving the bread its delicious airy texture.
- Sugar: Just a touch of sugar enhances the yeast’s activity and adds a subtle sweetness, balancing the savory flavors.
- Salt: Essential for flavor, salt also plays an important role in regulating yeast activity and strengthening gluten.
- All-Purpose Flour: The base of your bread, all-purpose flour provides the structure and heartiness needed for a satisfying loaf.
- Butter or Oil: Added for richness, fat lends flavor and keeps the bread tender and moist.
- Optional Ingredients: You might also consider incorporating herbs, spices, or even bits of cheese or dried fruit to personalize your bread.
Each ingredient plays a vital role in producing a loaf that is not only delectable but also embodies the spirit of what homemade bread should be. The combination of warm water, yeast, and sugar creates that crucial first activation, while flour provides the structure. Meanwhile, salt adds flavor while controlling yeast activity, ensuring an even rise. The butter or oil introduces richness, leading to a delightful texture that’s difficult to resist.
Here’s a table summarizing the key ingredients, including their functions:
| Ingredient | Purpose |
|———————–|———————————————————|
| Warm Water | Activates the yeast and hydrates flour |
| Active Dry Yeast | Ferments dough, creating air pockets for fluffiness |
| Sugar | Fuels yeast growth, enhances flavor |
| Salt | Enhances taste, controls yeast activity |
| All-Purpose Flour | Provides structure for the bread |
| Butter or Oil | Adds moisture, richness, and tenderness |
{image_template}
Step-by-Step Preparation for Easy Homemade Bread
Step One
Start by preparing your ingredients. Measure out one cup of warm water (about 110°F to 115°F is ideal; too hot will kill the yeast). Pour the warm water into a large mixing bowl, then sprinkle the active dry yeast and sugar over the water. Allow it to sit for about five to ten minutes until it becomes frothy. This step is crucial; it ensures that your yeast is active and ready to work its magic. Essentially, this is where the alchemy of bread-making begins.
Step Two
Once your yeast mixture is frothy, it’s time to add the dry ingredients. Mix in the salt and gradually add the all-purpose flour, about one cup at a time. You can begin using a wooden spoon to blend the ingredients until the dough starts to come together. As you stir, the mixture will begin to form a shaggy but cohesive dough. When it becomes difficult to stir, you can finish mixing by hand. The warmth of your hands will also help in bringing the dough together nicely.
Step Three
Once your dough has formed a ball, turn it out onto a lightly floured surface. Begin kneading it for about eight to ten minutes. Kneading is essential; it develops the gluten, giving your bread that lovely texture. You should press the dough down with the palm of your hand, fold it over, rotate it a quarter turn, and repeat the process. As you knead, the dough will become smoother and softer. If it feels too sticky, sprinkle a little more flour as needed, but avoid adding too much as that can dry the bread out.
Step Four
After kneading, place your dough in a greased bowl, cover it with a clean kitchen towel, and let it rise in a warm place for about an hour or until it has doubled in size. This is where the magic happens; the yeast consumes the sugars in the dough and produces carbon dioxide, causing the dough to expand. After an hour, punch the dough down gently to release any air bubbles, shape it into a loaf, and place it in a greased loaf pan. Let it rise again for an additional 30 minutes before baking. This second rise contributes to the softness and texture of your final loaf.
Full Cooking Directions
With your dough prepared and patiently waiting, let’s guide you through the entire process in a cohesive narrative form. Begin by combining warm water, sugar, and yeast in a bowl to activate the yeast. You want to see that frothy surface develop—indicating your yeast is working properly. Once that’s achieved, gradually incorporate the salt and flour, stirring until the mixture forms a shaggy dough.
Next, don’t rush; take your time with the kneading step. This process not only strengthens the gluten but infuses the bread with your love and effort. After kneading until your dough is smooth and elastic, it’s time to let it rise. Cover your bowl with a towel and place it in a warm area, fostering an environment where the yeast can thrive.
Patience is key during this first rise. When the dough has doubled, punch it down to release the gases, shape it, and transfer it to a greased loaf pan for a second rise. In these 30 minutes, preheat your oven to 350°F, setting the stage for the final act of your homemade bread. Once the dough has risen again, bake it for about 30-35 minutes until golden brown.
The moment you pull that fragrant loaf from the oven, let it cool slightly before slicing into it. Every bite is a testament to your effort and creativity, embodying the essence of fall and the joy of homemade bread.
Pro Tips & Extra Guidance
To take your easy homemade bread recipes to the next level, consider these pro tips. First, invest in a good quality instant-read thermometer; bread is best when baked to an internal temperature of 190°F to 200°F. If you want to add seeds or toppings, sprinkle them on during the second rise for beautiful presentation and enhanced flavor.
Also, feel free to experiment with different flours. Whole wheat flour adds a nutty flavor and can improve nutritional value, while bread flour provides more gluten protein, leading to taller loaves.
If your dough doesn’t rise as expected, check the yeast’s expiration date or ensure your water isn’t too hot. Proper kneading is crucial; under-kneaded dough may lead to dense bread, while over-kneading can make bread tough.
Lastly, take your time during baking. If the bread browns too quickly, tent it with aluminum foil for the last few minutes. The goal is to achieve a golden crust while the inside bakes fully.
Best Practices for Storing & Reheating
After you’ve successfully baked your bread and savored every slice, proper storage becomes crucial. To maintain freshness, wrap your loaf in wax paper or a clean kitchen towel, which allows it to breathe and prevents sogginess. For longer storage, consider slicing your bread and placing it in a resealable freezer bag. This way, you can freeze individual slices, what makes it easy to enjoy fresh bread whenever the mood strikes.
When reheating, a few methods ensure you achieve that fresh-out-of-the-oven warmth. You can pop thick slices in a toaster, bake them in a preheated oven at 350°F for a few minutes, or even revive them in a microwave for about 10-15 seconds. Just be sure to cover each slice with a damp paper towel in the microwave to prevent it from drying out.
Common Questions Answered
What if my dough doesn’t rise?
If your dough fails to rise, check if your yeast is alive by blooming it in warm water before adding it to the mix. Make sure the water temperature isn’t too hot or cold; ideally between 110°F and 115°F.
Can I add herbs or spices to my bread?
Absolutely! Feel free to experiment with different flavorings. Dried herbs like rosemary or thyme can enhance the flavor significantly. Add them during the mixing stage for even distribution.
How long can I keep homemade bread?
Homemade bread can last for about three to five days at room temperature, provided it’s stored properly. For longer shelf life, freezing is the best option.
Why is my bread dense?
A dense bread can result from under-kneading, adding too much flour, or not allowing enough time for the rise. Ensure you’re hitting all the right steps for the best outcome.
What can I do with leftover bread?
Think beyond simple toast! Leftover bread can be transformed into croutons, bread pudding, or even breadcrumbs for various recipes.
Can I use whole wheat flour instead of all-purpose flour?
Yes, but note that whole wheat flour absorbs more liquid. You may need to adjust the liquid content in your recipe accordingly for optimal results.
Is there a gluten-free version of this bread?
While this recipe is designed for all-purpose flour, gluten-free flour blends exist. You’d need to follow a gluten-free bread recipe, as these typically require additional binders.
Final Thoughts + Call to Action
Hello Fall presents the perfect opportunity to create warm, homemade bread recipes that fill your home with delightful aromas and provide a loving treat for family and friends. Embrace the simplicity and joy of bread-making this autumn season. So don’t just read about it—roll up your sleeves and jump into the experience of creating something special. Share your bread with loved ones, and let the warmth and flavor of homemade bread usher in the delightful days of fall. Happy baking!
Easy Homemade Bread
Embrace the spirit of autumn with this easy homemade bread recipe that is simple to follow and results in a soft, fluffy loaf perfect for sharing with family and friends.
Ingredients
Main Ingredients
- 1 cup Warm Water (110°F to 115°F) Essential for activating the yeast.
- 2.25 teaspoons Active Dry Yeast Responsible for fermentation and creating air pockets.
- 1 tablespoon Sugar Enhances yeast activity and adds sweetness.
- 2 teaspoons Salt Essential for flavor and regulating yeast activity.
- 4 cups All-Purpose Flour Provides structure for the bread.
- 2 tablespoons Butter or Oil Adds moisture, richness, and tenderness.
Optional Ingredients
- to taste Herbs, spices, or dried fruit Can be added for personalization.
Instructions
Preparation
- Measure out one cup of warm water. Pour it into a large mixing bowl and sprinkle the active dry yeast and sugar over the water. Let it sit for 5-10 minutes until frothy.
- Mix in the salt and gradually add the all-purpose flour, about one cup at a time, using a wooden spoon until a shaggy dough forms.
- Knead the dough on a lightly floured surface for 8-10 minutes until smooth and elastic.
- Place the dough in a greased bowl, cover with a clean towel, and let it rise in a warm place for about 1 hour, or until doubled in size.
- Punch the dough down gently to release air, shape it into a loaf, and place it in a greased loaf pan for a second rise of 30 minutes.
- Preheat your oven to 350°F while the dough rises for the second time.
- Bake for 30-35 minutes until golden brown. Let cool slightly before slicing.
Notes
Wrap the loaf in wax paper or a clean kitchen towel for freshness. For longer storage, freeze individual slices in resealable bags.