
Follow Me On Social Media!


Oreo Mousse

Oreo Mousse is a delightful dessert that exudes both richness and nostalgia. For many, Oreos spark memories of childhood, of dunking those iconic cookies in milk and sharing them with loved ones. This Oreo Mousse takes that beloved cookie experience to a new level, blending smooth, creamy layers of luscious mousse with the bold flavor of Oreos. This dessert is not only visually stunning but also simple enough to make for any occasion, offering a perfect balance of sweetness and chocolatey crunch. Whether you’re hosting a party, celebrating a birthday, or simply treating yourself, Oreo Mousse will bring joy to your taste buds and smiles to your guests. 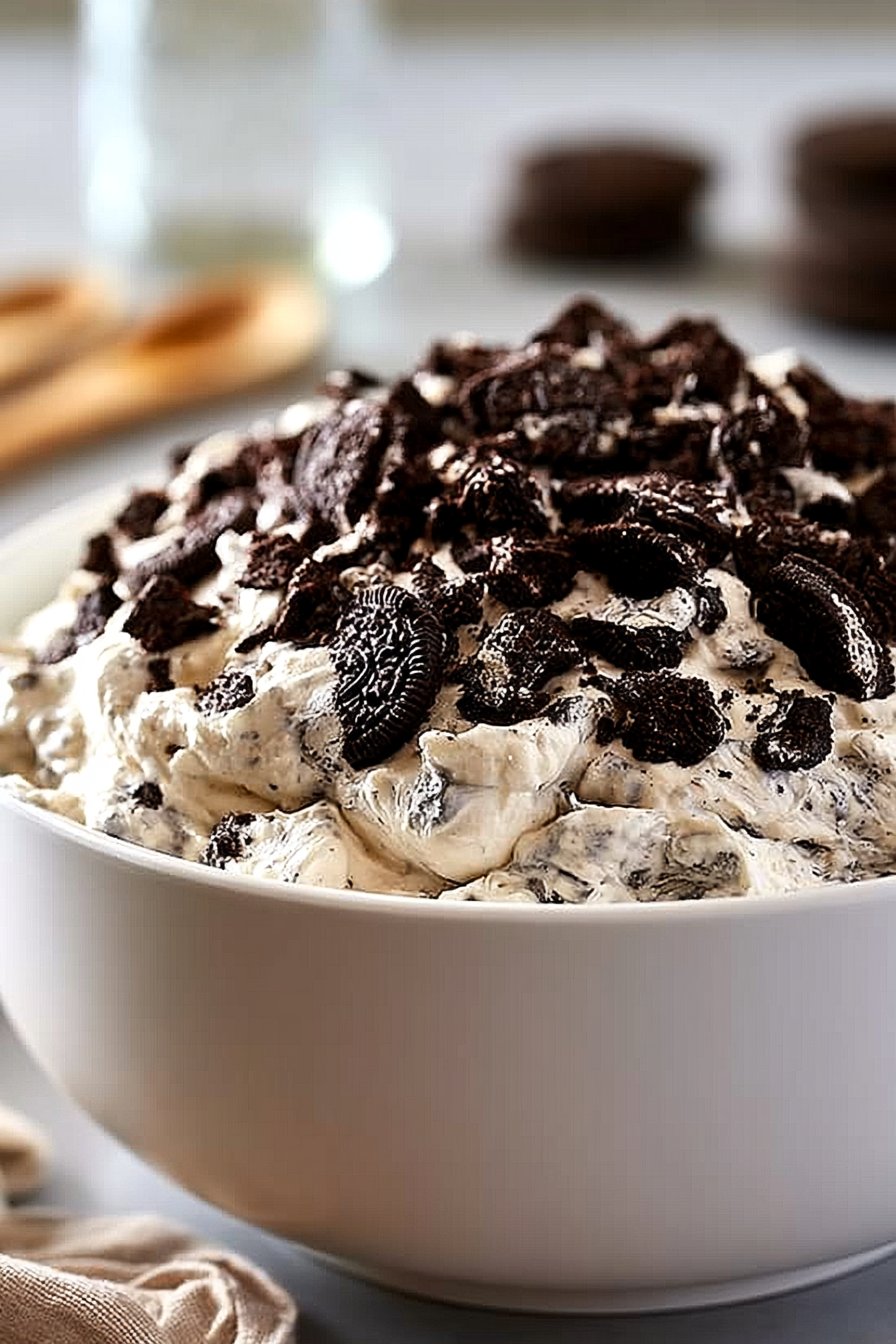
What Makes This Recipe Stand Out
What sets Oreo Mousse apart from other desserts is the harmonious blend of textures and flavors. First, the airy mousse creates a sense of indulgence, while the crunchy Oreo pieces add satisfying contrast. This delightful combination appeals to a wide audience, making it a universal favorite.
In addition to its deliciousness, this recipe is incredibly versatile. You can serve it in individual glasses for an elegant presentation, layer it in a trifle dish for family gatherings, or even use it as a cake filling for a show-stopping dessert. Each option brings a unique aspect to the dish while still maintaining that beloved Oreo identity.
Moreover, while it appears sophisticated, Oreo Mousse remains accessible for home cooks at any skill level. With just a handful of ingredients and straightforward steps, you can impress friends and family without spending hours in the kitchen. This dish invites creativity, allowing you to adapt the recipe with other flavors or add toppings that suit your palate.
Additionally, the simplicity of no-bake desserts like this one means you can prepare them ahead of time. This feature proves particularly handy when planning a busy week.
Ultimately, Oreo Mousse represents the perfect marriage of childhood comfort and gourmet appeal.
Ingredient Breakdown
Before diving into making your Oreo Mousse, let’s take a closer look at the ingredients that make up this luxurious dessert.
- Oreo Cookies: The star of the show. These creamy-filled chocolate cookies give the mousse its distinct flavor and texture.
- Heavy Whipping Cream: This ingredient adds a rich, creamy texture and a sense of indulgence to the mousse.
- Sugar: Essential for balancing the flavors, sugar enhances the sweetness of the dessert, ensuring it appeals to the sweet tooth in all of us.
- Vanilla Extract: This flavor booster adds warmth and depth, rounding out the overall taste profile of the mousse.
- Gelatin: Used to stabilize the mousse, gelatin provides structure while keeping the dessert light and fluffy.
- Cream Cheese: This ingredient helps to create a denser, richer mousse, merging beautifully with the heavy cream for an irresistible texture.
Collectively, these ingredients come together to create an unforgettable experience. The table below summarizes the role of each ingredient in the recipe.
| Ingredient | Role in Recipe |
|———————–|———————————————————————–|
| Oreo Cookies | Provides flavor and texture; key element in creating the mousse. |
| Heavy Whipping Cream | Adds richness and creaminess; creates the desired texture. |
| Sugar | Balances taste; enhances overall sweetness. |
| Vanilla Extract | Contributes to flavor depth; enhances sweetness. |
| Gelatin | Stabilizes the mousse; helps achieve the desired airy texture. |
| Cream Cheese | Adds richness and body; contributes to a creamy texture. |
Step-by-Step Preparation for Oreo Mousse
Step One
To begin, gather all your ingredients and ensure they’re at room temperature. This prepares them for mixing and helps them combine more easily. Start by separating the Oreo cookies into two parts: the cookie halves and the creamy filling. You can use a food processor to crush the cookie halves into fine crumbs. This step ensures a uniform texture in the dessert. If you don’t have a food processor, simply place the cookies in a resealable plastic bag and crush them with a rolling pin. Set aside about a half-cup of the crumbs for garnishing.
Step Two
Next, prepare the gelatin according to the package instructions. Typically, this involves sprinkling the gelatin over a small amount of cool water and letting it sit for a few minutes to bloom. Once bloomed, gently heat it until it’s fully dissolved. While that’s cooling, take a mixing bowl and beat the heavy whipping cream with an electric mixer until it reaches soft peaks. Remember, you want it to be light and fluffy, not overly stiff. In a separate bowl, beat the cream cheese until smooth, mixing in the sugar and vanilla until well combined. Once the gelatin has cooled, mix it into the cream cheese mixture to ensure it’s fully incorporated.
Step Three
Now it’s time to bring it all together. Fold the whipped cream gently into the cream cheese mixture. Use a spatula to carefully incorporate the whipped cream without deflating it too much; this will keep the mousse light and airy. After that, add the crushed Oreo cookies to the mixture, stirring gently until you distribute the cookie pieces evenly throughout. The combination of flavors will be mouthwatering.
Step Four
Finally, spoon the mousse into individual serving cups or a trifle dish. If using cups, fill them generously, leaving some room at the top for the reserved cookie crumbs you’ll sprinkle for presentation later. Once filled, cover the mousse with plastic wrap and refrigerate it for at least four hours, or overnight for the best results. This chilling time allows the flavors to meld and the mousse to set properly, giving you that perfect texture that melts in your mouth.
Full Cooking Directions — For the Vanilla Pudding:, For the Mousse:
To make the vanilla pudding, start by combining milk, sugar, cornstarch, and a pinch of salt in a saucepan. Whisk the ingredients together and bring the mixture to a simmer over medium heat while continuously stirring. Once it thickens, remove it from the heat and stir in the vanilla extract. Allow the pudding to cool before incorporating it into the mousse (although it is optional).
For the mousse, follow the steps previously outlined. Start by preparing the Oreo cookie base, processing the cookies until fine. After that, whip the cream and beat the cream cheese mixture. Don’t forget about incorporating your gelatin, which helps in achieving a stable mousse despite the lightness. When all components are ready, combine them cautiously and create layers for your serving dishes.
After completing these steps, refrigerate the mousse as mentioned earlier. As it sets, the flavors will deepen and develop, resulting in a dessert that evolves even after the initial preparation. The wait will be worthwhile as you anticipate the creamy, sweet delight that awaits you.
Pro Tips & Extra Guidance
Here are some pro tips to ensure your Oreo Mousse turns out perfectly:
-
Ingredient Temperature: Using room-temperature cream cheese ensures that it combines smoothly with the other ingredients.
-
Be Gentle When Folding: When incorporating the whipped cream, use a folding motion instead of stirring to maintain the airiness of the mousse.
-
Chill Thoroughly: Allow adequate chilling time. Overnight chilling yields the best texture and flavor.
-
Customization: Feel free to customize your mousse by adding other flavors, like mint or peanut butter, to tap into different palates.
-
Toppings: Top the mousse with whipped cream, crushed Oreos, or chocolate shavings for a beautiful finish.
-
Serving Size: Adjust the serving size by using smaller cups for bite-sized portions or larger cups for more indulgence.
Best Practices for Storing & Reheating
To keep your Oreo Mousse fresh, store it covered in the refrigerator. The mousse should last for three to four days, but make sure to avoid metal containers that can react with the chocolate in the Oreos. If you have made more than you can consume in a few days, consider freezing it. To do so, transfer it to an airtight container before placing it in the freezer. Keep in mind that the texture may change slightly upon thawing, but it should still taste delicious.
When it comes to reheating, you won’t want to reheat this dessert as it’s served chilled. Instead, simply enjoy it straight from the fridge. If it’s frozen, allow it to sit at room temperature for about 30 minutes before serving to soften slightly.
Common Questions Answered
What can I do if my mousse didn’t set properly?
If your mousse isn’t setting, ensure you used the right amount of gelatin. The gelatin should be dissolved properly and allowed to cool before mixing. If the mousse still doesn’t set after chilling, it’s possible that the cream wasn’t whipped enough.
Can I make Oreo Mousse in advance?
Absolutely! This mousse can be made up to 48 hours in advance. Simply store it in the refrigerator covered tightly to retain its freshness.
How can I make this gluten-free?
To make Oreo Mousse gluten-free, utilize gluten-free Oreo cookies. Most brands now carry gluten-free versions, so you won’t have to sacrifice flavor or texture.
Can I substitute a different type of cookie?
Yes! Feel free to experiment with different cookies such as chocolate chip cookies or even thin mints. Each variation will bring a distinct flavor to the mousse.
How can I enhance the flavor?
Add extracts like almond or peppermint to elevate the taste. You can also incorporate different flavored creams, such as a chocolate-flavored whipped cream, for a fun twist.
Is this mousse safe for pregnant women?
While it contains heavy cream and cream cheese, this mousse should be safe for most pregnant women. However, always consult with a healthcare professional regarding dietary restrictions during pregnancy.
Can I layer Oreo Mousse with other desserts?
Definitely! Layering Oreo Mousse with pudding, cake, or other desserts can add incredible depth and richness, creating a show-stopping dessert.
Final Thoughts + Call to Action
Oreo Mousse brings together comfort and creativity in a dessert that pleases the palate while evoking treasured memories. As you prepare to indulge in this delightful treat, remember that the joy of cooking comes not just from the final product, but also from the process. With its simple ingredients and quick steps, this recipe invites you to be creative and share your love of desserts with others. So, gather your ingredients and whip up a batch of this delectable Oreo Mousse today!
Oreo Mousse
Oreo Mousse is a delightful no-bake dessert blending smooth, creamy layers of mousse with crunchy Oreo pieces, making it a perfect treat for any occasion.
Ingredients
Main Ingredients
- 16 oz Oreo Cookies Crushed, separated into halves and filling
- 2 cups Heavy Whipping Cream Chilled
- 1/2 cup Sugar Adjust based on taste preference
- 1 tsp Vanilla Extract Enhances flavor
- 1 tbsp Gelatin Dissolved in water
- 8 oz Cream Cheese At room temperature for easier mixing
Instructions
Preparation
- Gather all ingredients and ensure they are at room temperature.
- Separate Oreo cookies into cookie halves and creamy filling. Crush the cookie halves into fine crumbs using a food processor or a rolling pin.
- Set aside 1/2 cup of cookie crumbs for garnishing.
- Prepare gelatin according to package instructions and let it bloom.
Mixing
- Beat heavy whipping cream in a mixing bowl until it reaches soft peaks.
- In a separate bowl, mix cream cheese with sugar and vanilla extract until smooth.
- Once gelatin is cool, incorporate it into the cream cheese mixture.
- Gently fold the whipped cream into the cream cheese mixture.
Assembling
- Fold in the crushed Oreo cookies evenly into the mousse mixture.
- Spoon the mousse into individual serving cups or a trifle dish.
- Cover and refrigerate for at least 4 hours or overnight.
Notes
For best results, chill overnight and consider adding toppings like whipped cream or chocolate shavings before serving.